 Ed
Ed
To establish a connection between Ed Controls Project and Microsoft SharePoint, the following is required:
- Active Ed Controls license “Expert” for an Ed Controls Project
- At least the Admin role of a contract or the Accountable role in a project to set up the connection. Note that a work planner who has to establish the link cannot therefore be a Support. Then he won’t have access to “the pencil” of the project settings in Ed Controls.
- Active subscription to Microsoft SharePoint Online (Note: We do not support SharePoint 2010, 2013, 2016, 2019 or any version running on-premises on your own server)
- You will also need your login credentials to log into Office 365 account for the above subscription, you do not need administrator privileges in the SharePoint account, only read privileges.
Since the Microsoft SharePoint Online account is shared for the connection
between all users of your project, we recommend setting up a service account, at
this way you avoid service disruption when you have the user somewhere in the
future in SharePoint removes or invalidates.
Follow the steps below to set up the connection:
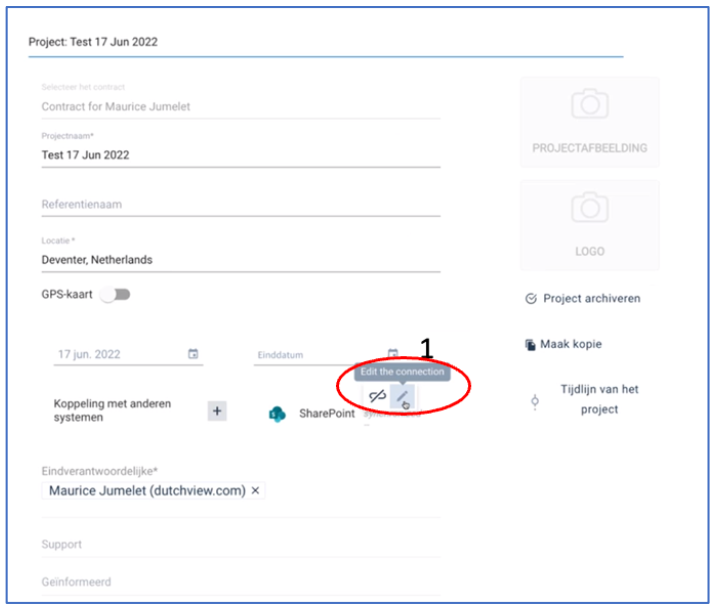
To establish a connection, navigate to the project settings on the Ed Controls web interface and click on the pencil icon (1).

Click the “plus” sign (2) next to “Connections to other systems” and select SharePoint, click Apply (3). If you click on the “Set up Connection” link (4), you will be redirected to the connection setup screen for SharePoint:
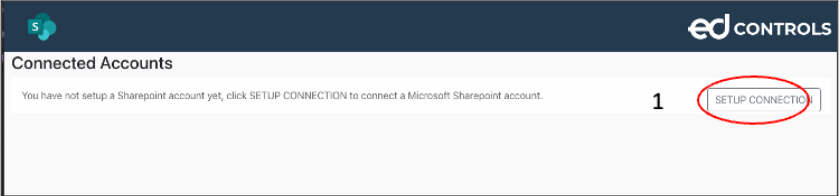
Click on “Setup Connection” (1) and log in with your login credentials and comply with the access requests:

Once everything is successful, you need to select the Sharepoint project that you want to connect Ed Controls to. Therefore, enter (part of) the name of the project from Sharepoint now.
Then the appropriate Sharepoint projects appear based on your login information.
After you select the project, you’ll see something similar to this:
The connection is now set up, but no files are synchronized yet. To do this, proceed to step 2.
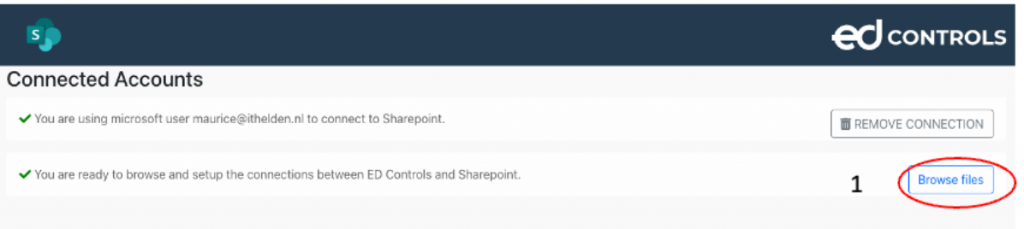
To get files from SharePoint to Ed Controls, the metadata columns in SharePoint must be “connected” to the Groups in Ed Controls, click on “Browse files” to files (1) to make this connection.
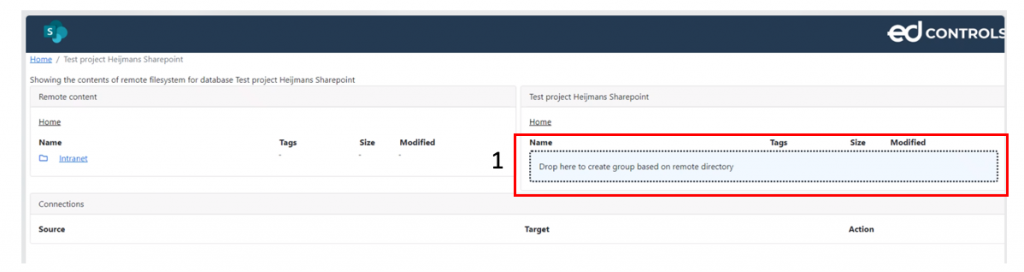
Below is an impression of what the SharePoint interface looks like. On the left side of this screen, you will see the list of files that are in the Sites and/or Libraries that you have access to in SharePoint. On the right site you can see the groups that are in the project in Ed Controls. At the bottom you can see the active connections between SharePoint and Ed Controls and their status.
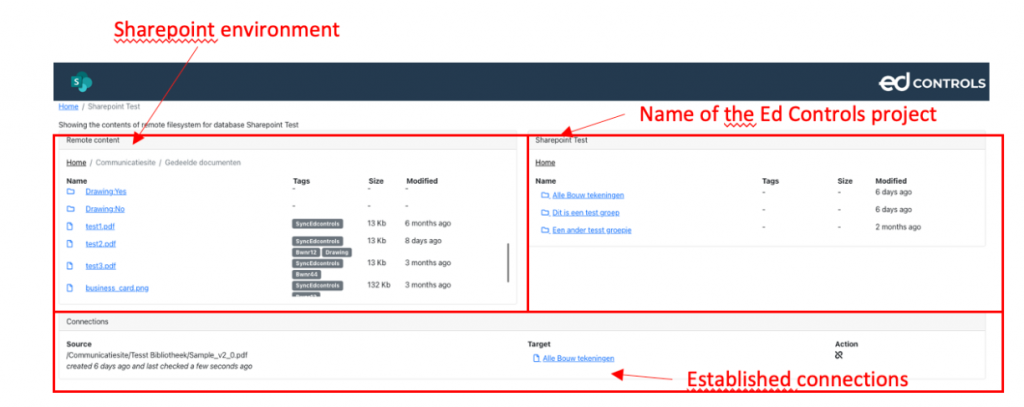
To create a new connection, you can drag and drop a folder (or file) from the left site to the right site of the screen (1). When this is done, all files from the source folder are copied to the target in Ed Controls.
There are two ways to create a folder structure in conjunction with the SharePoint link:
- Create the groups first in the project in Ed Controls and then fill them from the SharePoint environment described above (drag from SharePoint to the group in Ed Controls);
- Create the folders in Ed Controls using the Sharepoint connector. On the left side, filter only “drawings” and select the folder at the top (see image below). The moment you drag this folder to the right containing all the subfolders, the folders containing the drawings are created in Ed Controls.
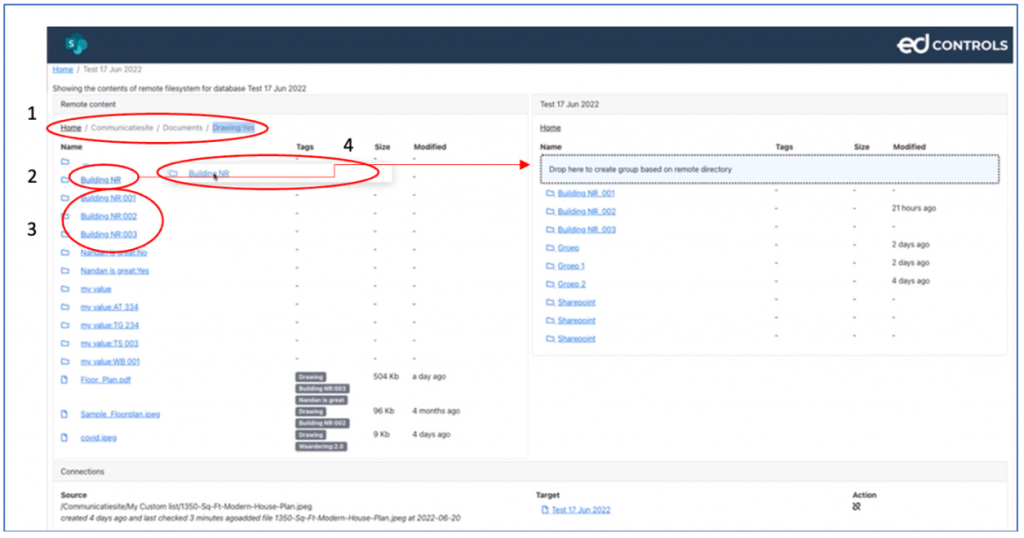
In this image see the following:
At (1) you can see that we made the selection to want to synchronize only the Drawings. At (2), you can see that we have a folder of the Building Numbers where the other building numbers are underneath as folders (3). Then, therefore, (2) and not (3) is dragged to the right (4). At that point, folders are created in Ed Controls for the specific building numbers and from that point on, the drawings are pushed and synchronized into Ed Controls.
All metadata columns you add in SharePoint are added as a label in Ed Controls, all files created from SharePoint are also labeled “SHAREPOINT”. On the left site, you can filter files based on metadata columns, or you can click on
a folder name, the folder will only contain files that have that specific metadata value in SharePoint.
How do you set up metadata information in SharePoint?
1. Go to the specific library on the SharePoint site;
2. Select the settings options, top right;
3. Go to Library Settings, see image below:
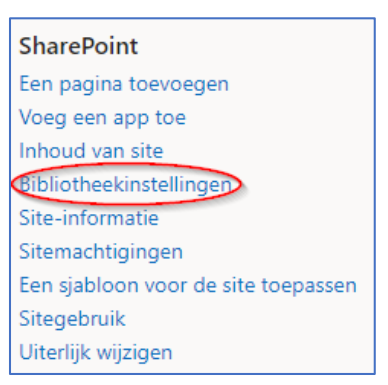
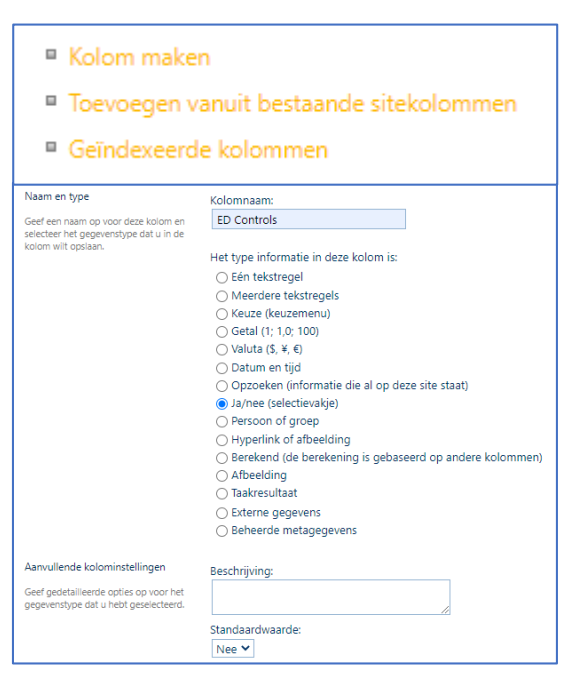
4. In Columns, select Create Column.
5. Add column: “Ed Controls”
6. Select: “Yes/No (option button, see image below)”
7. Default value: “No”
8. Press “OK” to create it
9. The metadata field can be added and the
value can be set to “Yes”. However, this is not
mandatory for the operation of the connection.
Documents or drawings in Ed Controls
In general, if you know that a specific document is a floor plan and needs to be automatically converted to a drawing format in Ed Controls and not as “Other Document”, you need to add a column in SharePoint “Drawing” or “Tekening” and give it a value (true/false). All documents that have the metadata value “Drawing” or “Tekening” with “True” are automatically converted to a drawing in Ed Controls.
If you prefer to control this manually in Ed Controls, you can do that too. Manually converting a document to a drawing for tickets in Ed Controls will continue to do so with future updates to the file.
Do you want to disconnect later or reopen access to the SharePoint connector at a later time,
then you can do so through the project settings.
Click “Edit the connection” (1) and adjust the settings in SharePoint.
To disconnect click on the “Remove link” icon.